How to make shaving foam paint pictures

Make textured marbled pictures using shaving foam and paint. A great fun craft that kids will love. Here are the step by step instructions for shaving foam paint:
This page contains affiliate links, which means we may earn a small amount of money if a reader clicks through and makes a purchase. All our articles and reviews are written independently by the Netmums editorial team.
You will need:
- white shaving foam
- paint
- a cocktail stick
- card
How to make shaving foam paintings
1
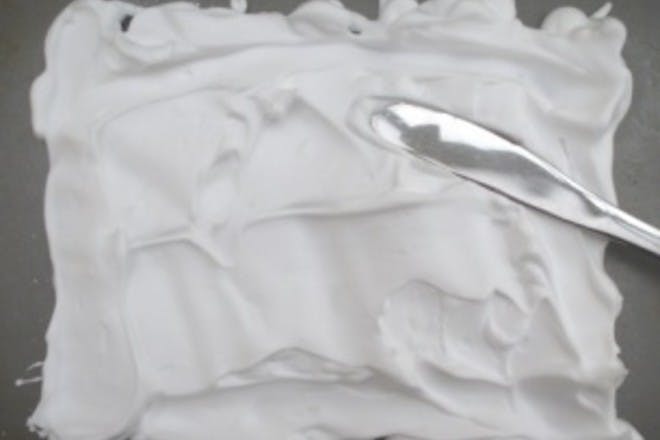
Squirt some shaving foam into a tray (a baking tray is ideal) and smooth it out with a knife.
2

Now squirt on some paint. You can just do a squiggle of different colours.
3

Take a cocktail stick and swirl the colours through the shaving foam until they all marble together and leave a pretty pattern. This stage is art in itself and such fun to do.
4
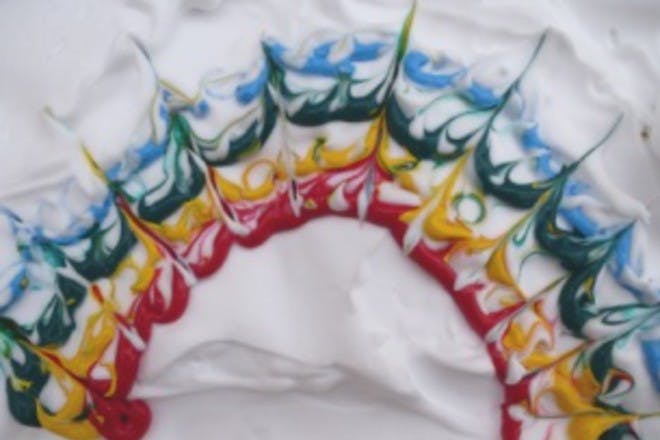
If you want you can squirt a rainbow of colours in an arc and take a cocktail stick to swirl and pull up the colours to make a pretty rainbow. Again at this stage this is a lovely textured picture in itself (although it won't last).
5
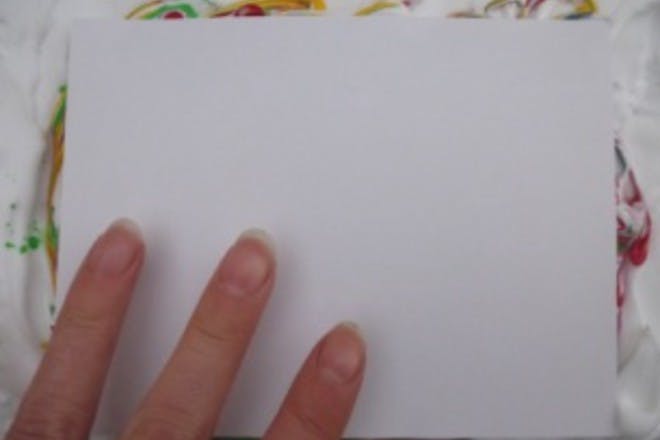
Take a piece of card and place it gently on top of your shaving foam and paint. Don't press too hard at all or it all goes too squidgy.
6
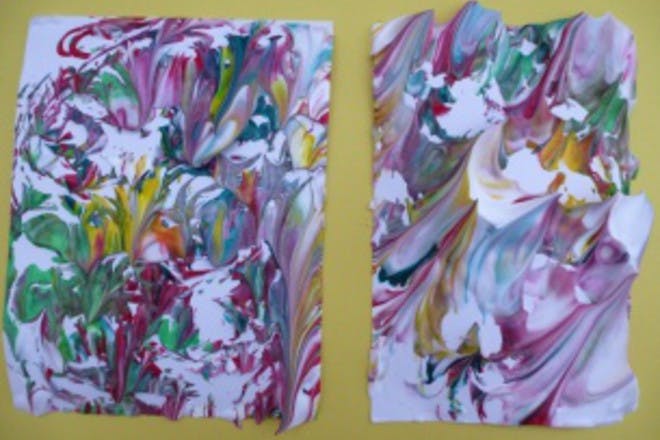
Gently peel off the card and you are left with a wonderfully textured swirl of 3D colours. They 'sink' a little as they dry but still look amazing and keep their 3D texture.
Best of all when it comes to cleaning up it's easy peasy as the shaving foam helps wash everything away and smells great too!
Once again - let your children experiment and explore with this activity to come up with ideas of their own. They can try out different ways to squeeze in the paint, different ways to make patterns once it is mixed with the shaving foam and different ways to print their pictures at the end. You can also simply mix equal parts of paint and shaving foam to make puffy paint and paint pictures using it. They take a while to dry but they are fabulously colourful and textured when they do.
Looking for more arty inspo? Check out these ideas or swap tips with other parents in our forum below.
Related stories